Everyday 3DNA Blueprint
2D-to-3D Planning for zirconia-oxide veneers (11–21–23–24) Without Wax-Up or Facebow
Full video walkthrough available
This case follows the exact workflow shown in the video tutorial. Watch the video to see the complete digital planning step by step.
Abstract
A patient requested an esthetic improvement with minimal intervention. Instead of a conventional wax-up/mock-up workflow, only 2D design for teeth (11–21–23–24) was planned and prepared using a time-efficient digital protocol.
A simple 2D Smile Design served as the visual target, which was then transferred into Smilecloud 3DNA over real intraoral preparation geometry. Using a single calibrated face photo (no facebow), the maxillary orientation and final tooth proportions were established and delivered to the technician as a precise 3D blueprint. This approach demonstrates a “real-life” 3DNA workflow suitable for busy daily prosthetic schedules.
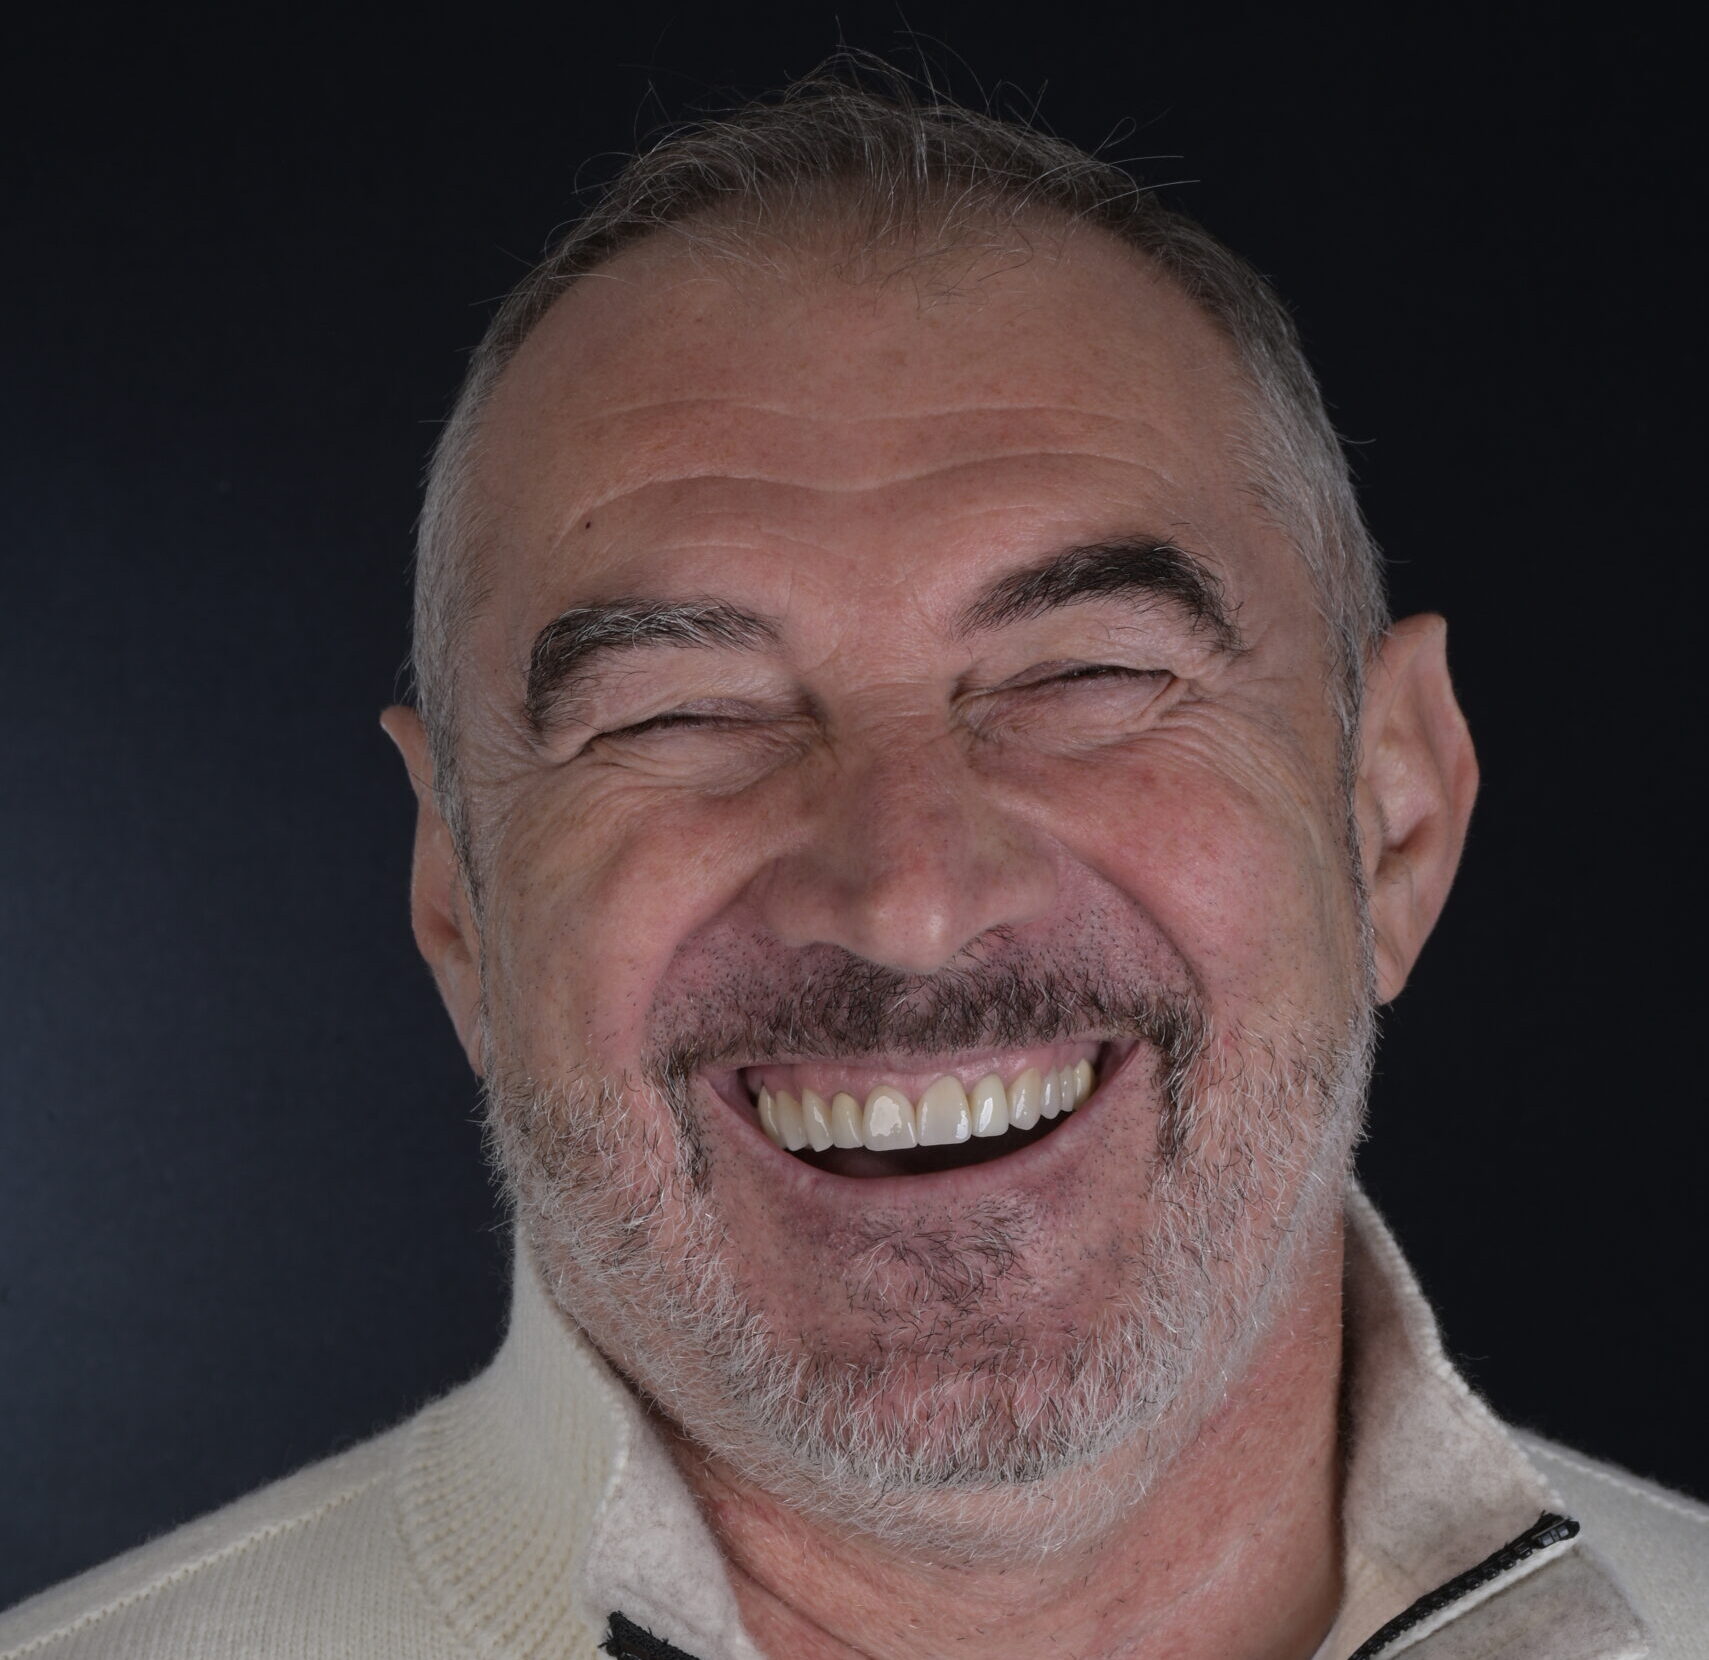
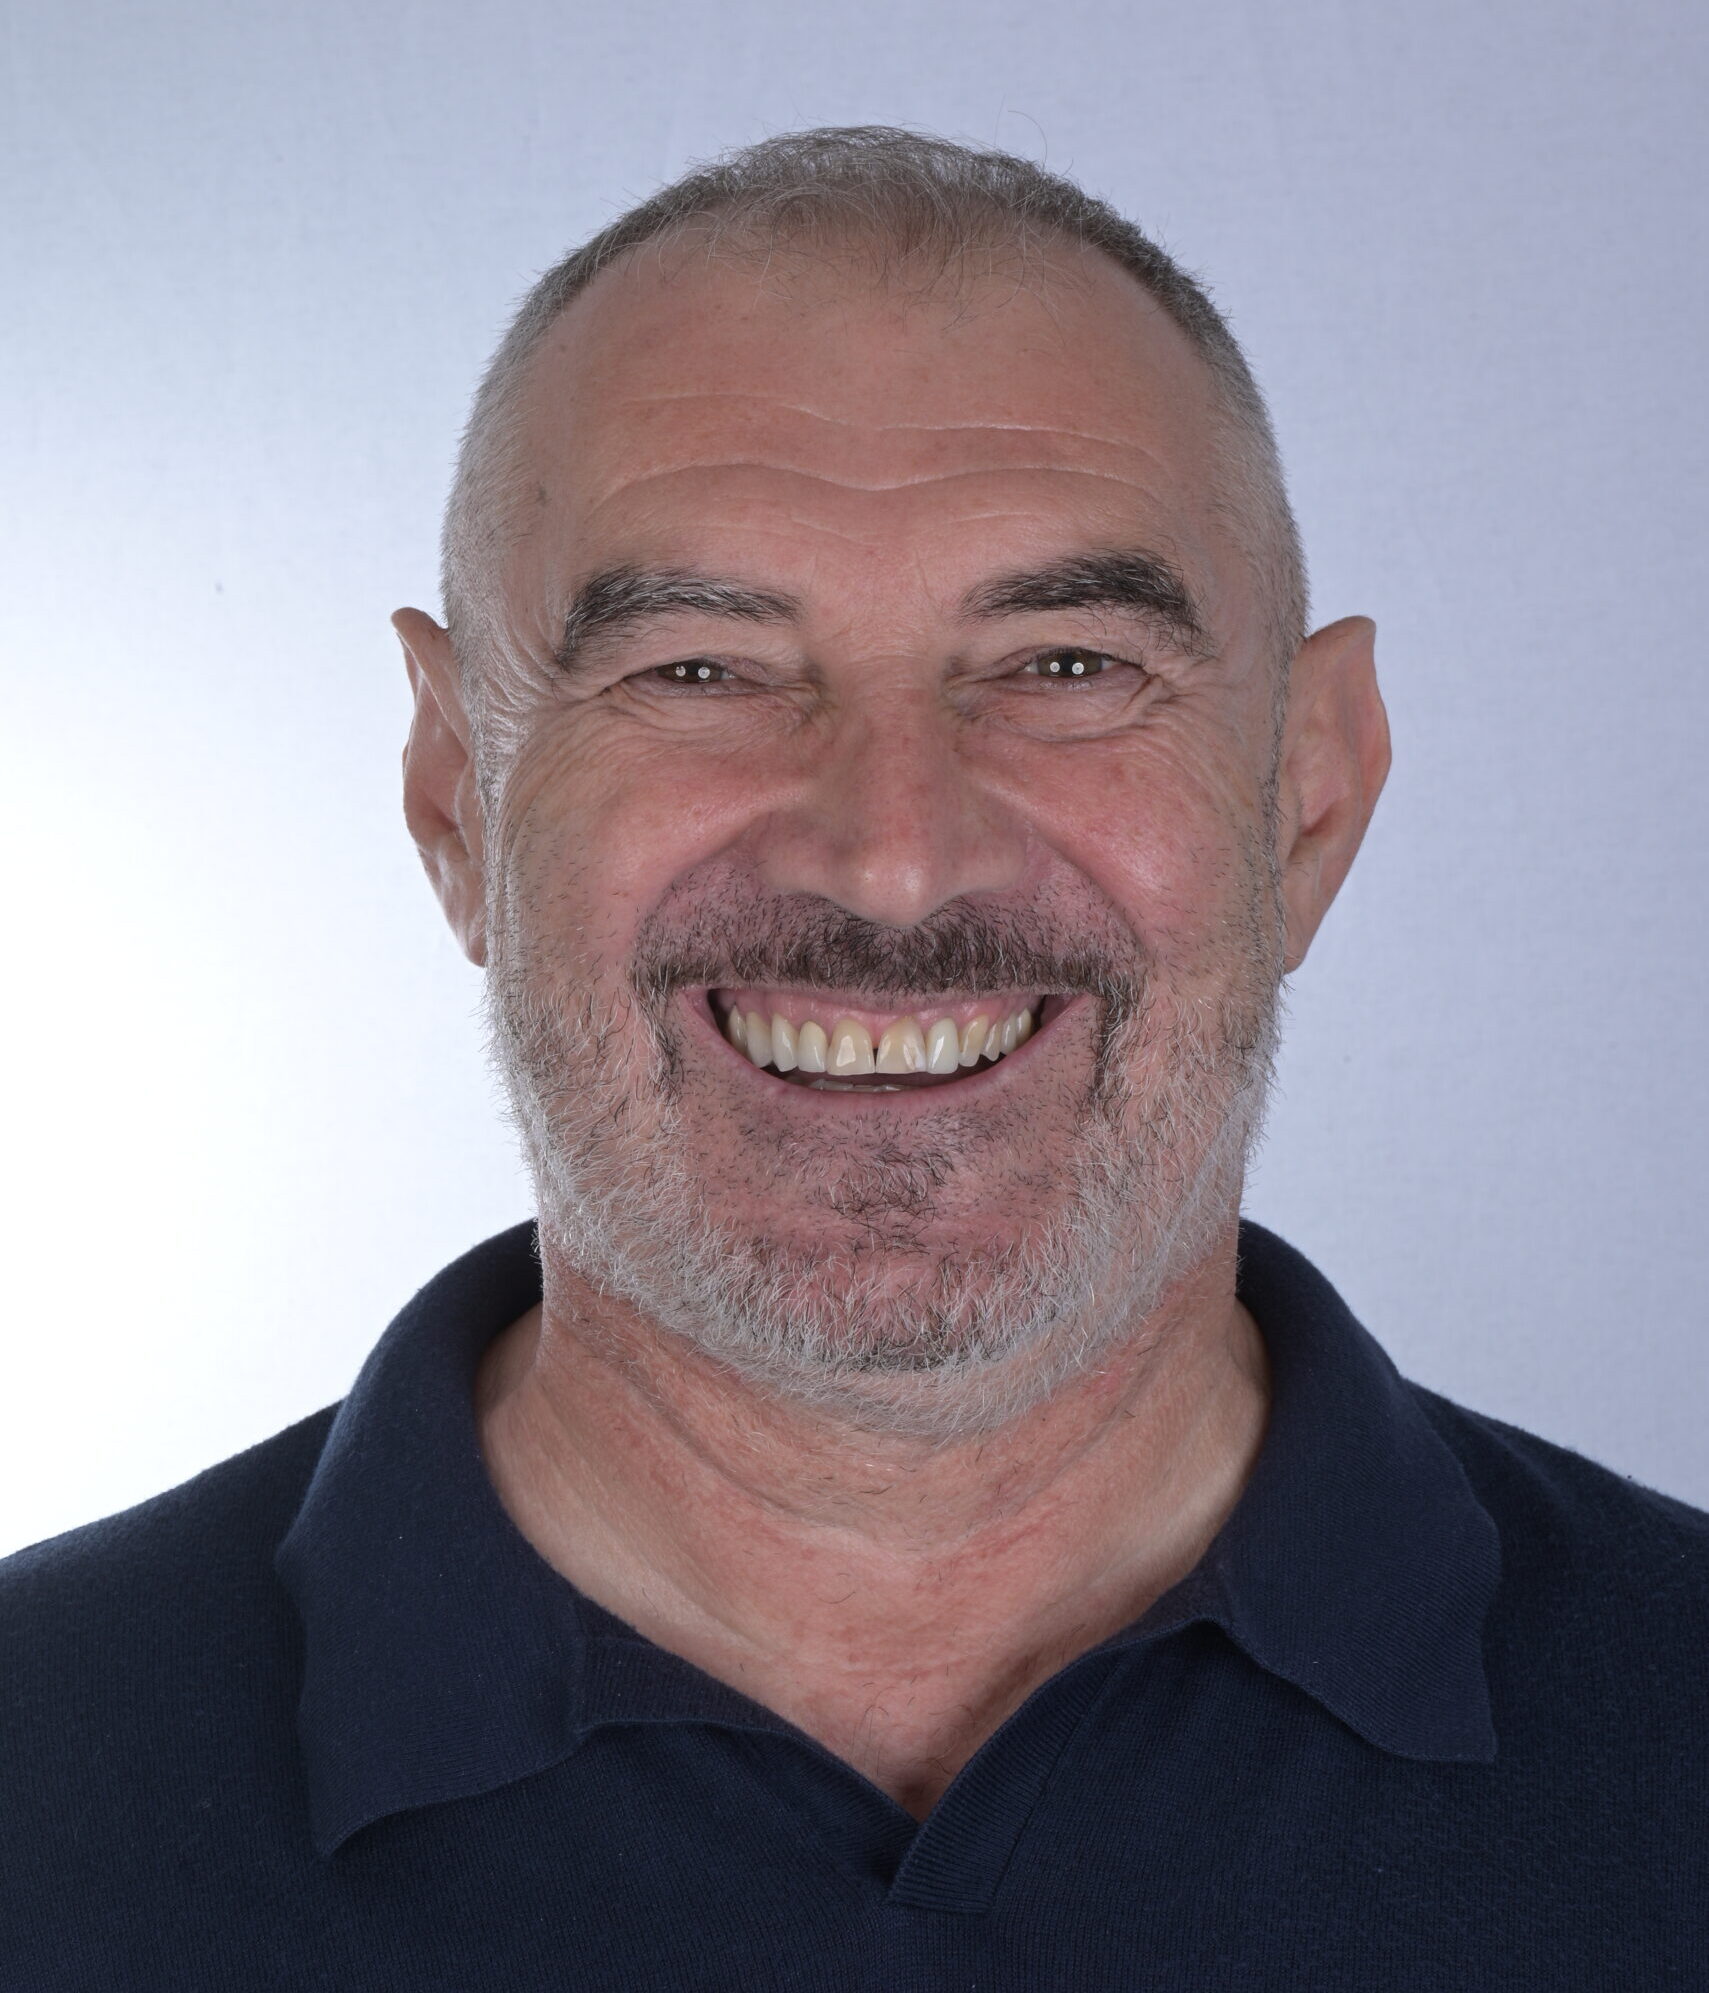
Patient situation and chief complaint
Chief complaint: The patient desired an esthetic improvement with minimal intervention, without altering the entire arch.
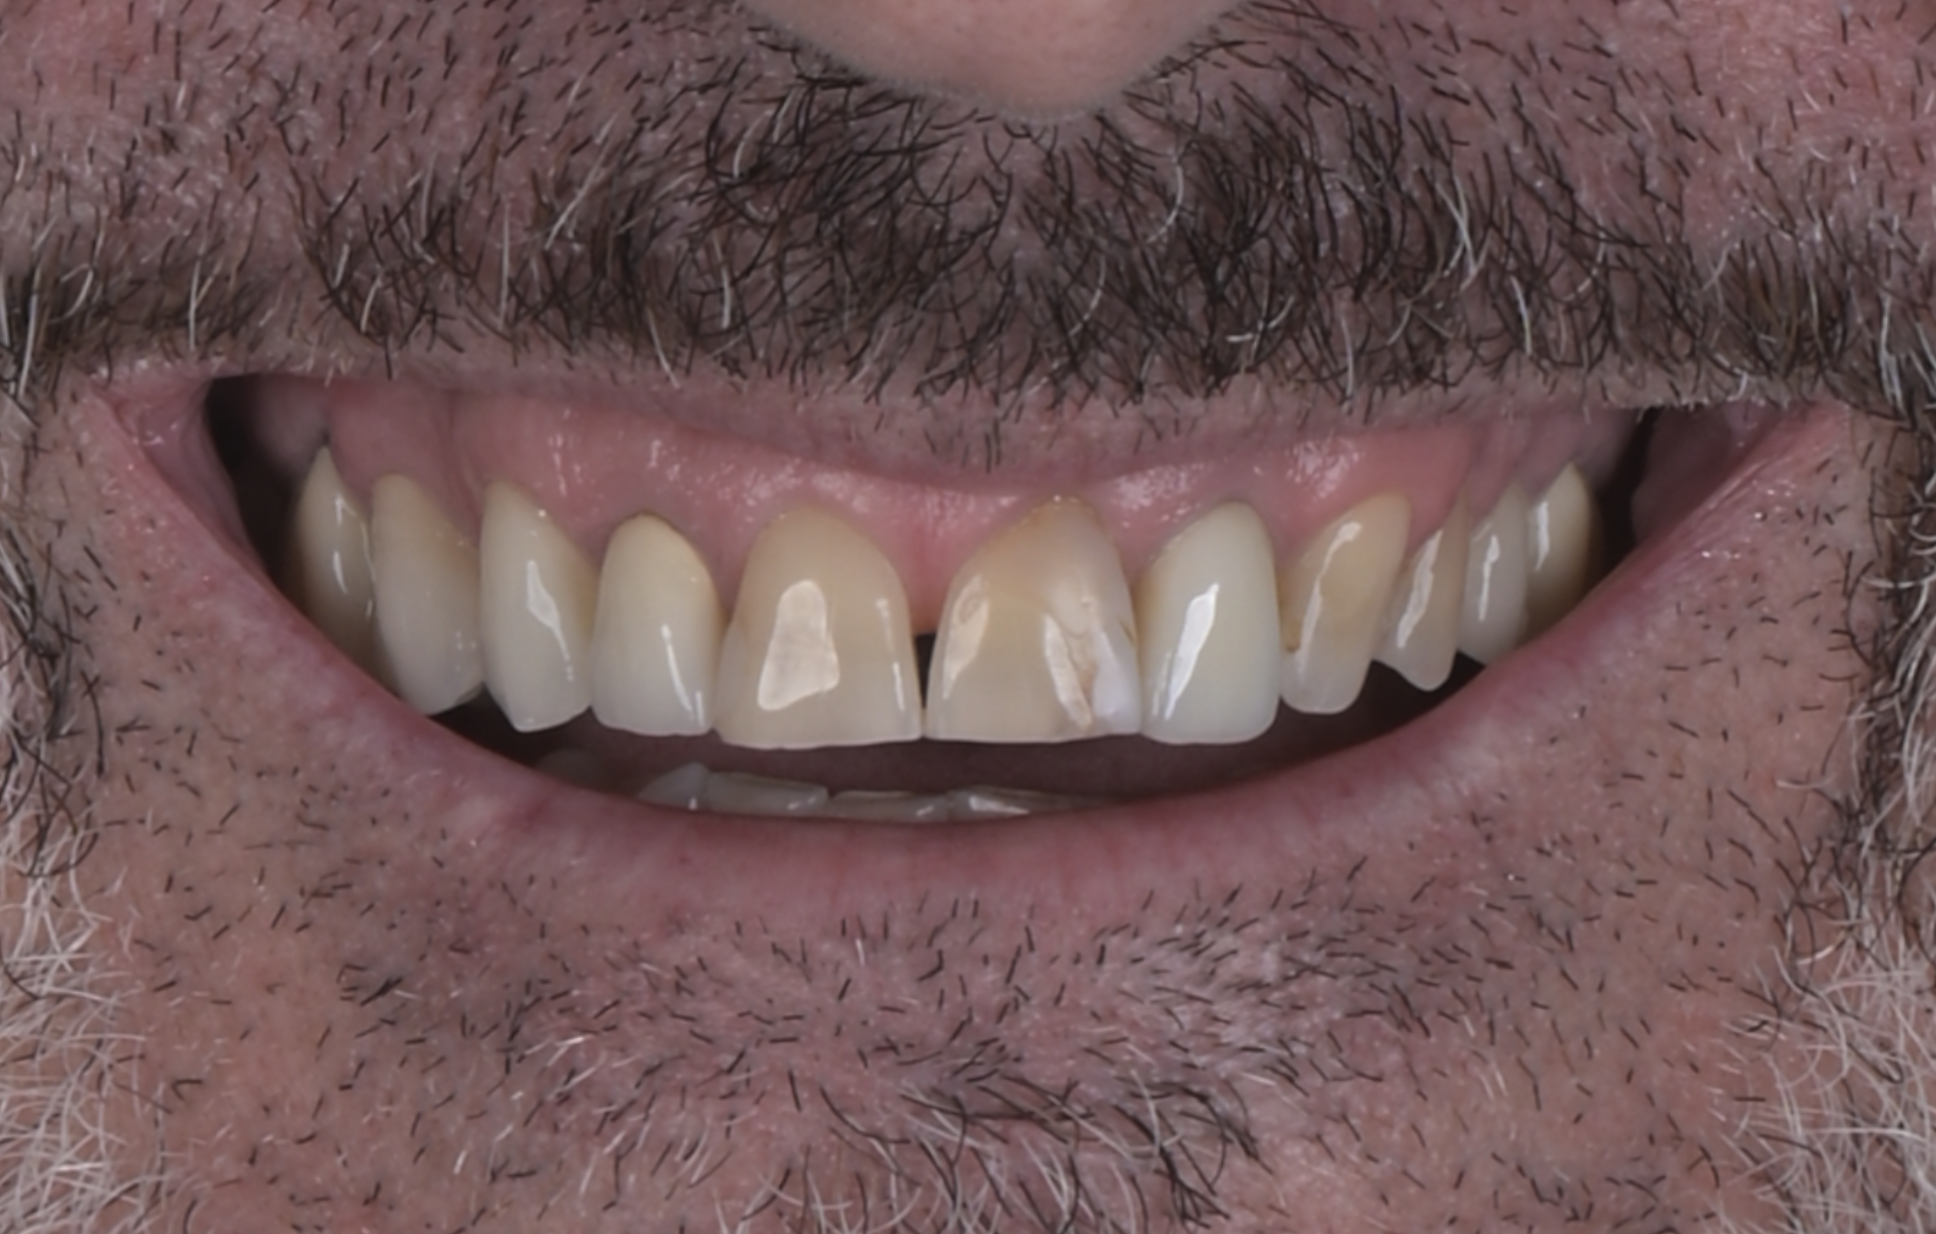
Initial condition: The patient had discolored central incisors in the maxillary esthetic zone. A limited-scope treatment plan was chosen to improve the smile while keeping the case efficient and conservative.
Decision-making: I’m always using a single photo with a full smile in a neutral head position and by using the grid, a smilecloud Smile design feature I decide which teeth need to be corrected to improve the smile line and the overall esthetics.
Treatment objectives
1. Improve esthetics while treating only four units (11–21–23–24).
2. Maintain a streamlined workflow without full wax-up / mock-up.
3. Create a clear, transferable plan for the laboratory based on:
- Facial orientation
- Controlled tooth length/shape changes
- Real preparation design and occlusal relationships
Digital planning concept
This case used a 2D → 3D transfer approach:
- 2D smile design for patient motivation and targeted changes (only four teeth) at the first appointment.
- Generic preparations are performed clinically to save time and keep the appointment practical.
- TRIOS scans (pre-prep and post-prep) serve as the reference geometry.
- Smilecloud 3DNA used to align the maxilla to the face from a single calibrated photo, transfer the 2D design into 3D, and create a technician-ready blueprint directly over the actual preps.
Learn the exact workflow used in this case and more
Find out more about The Smile Protocol — live sessions, real cases, and a structured path to mastering SmileCloud and 3DNA.
Clinical + digital workflow (step-by-step)
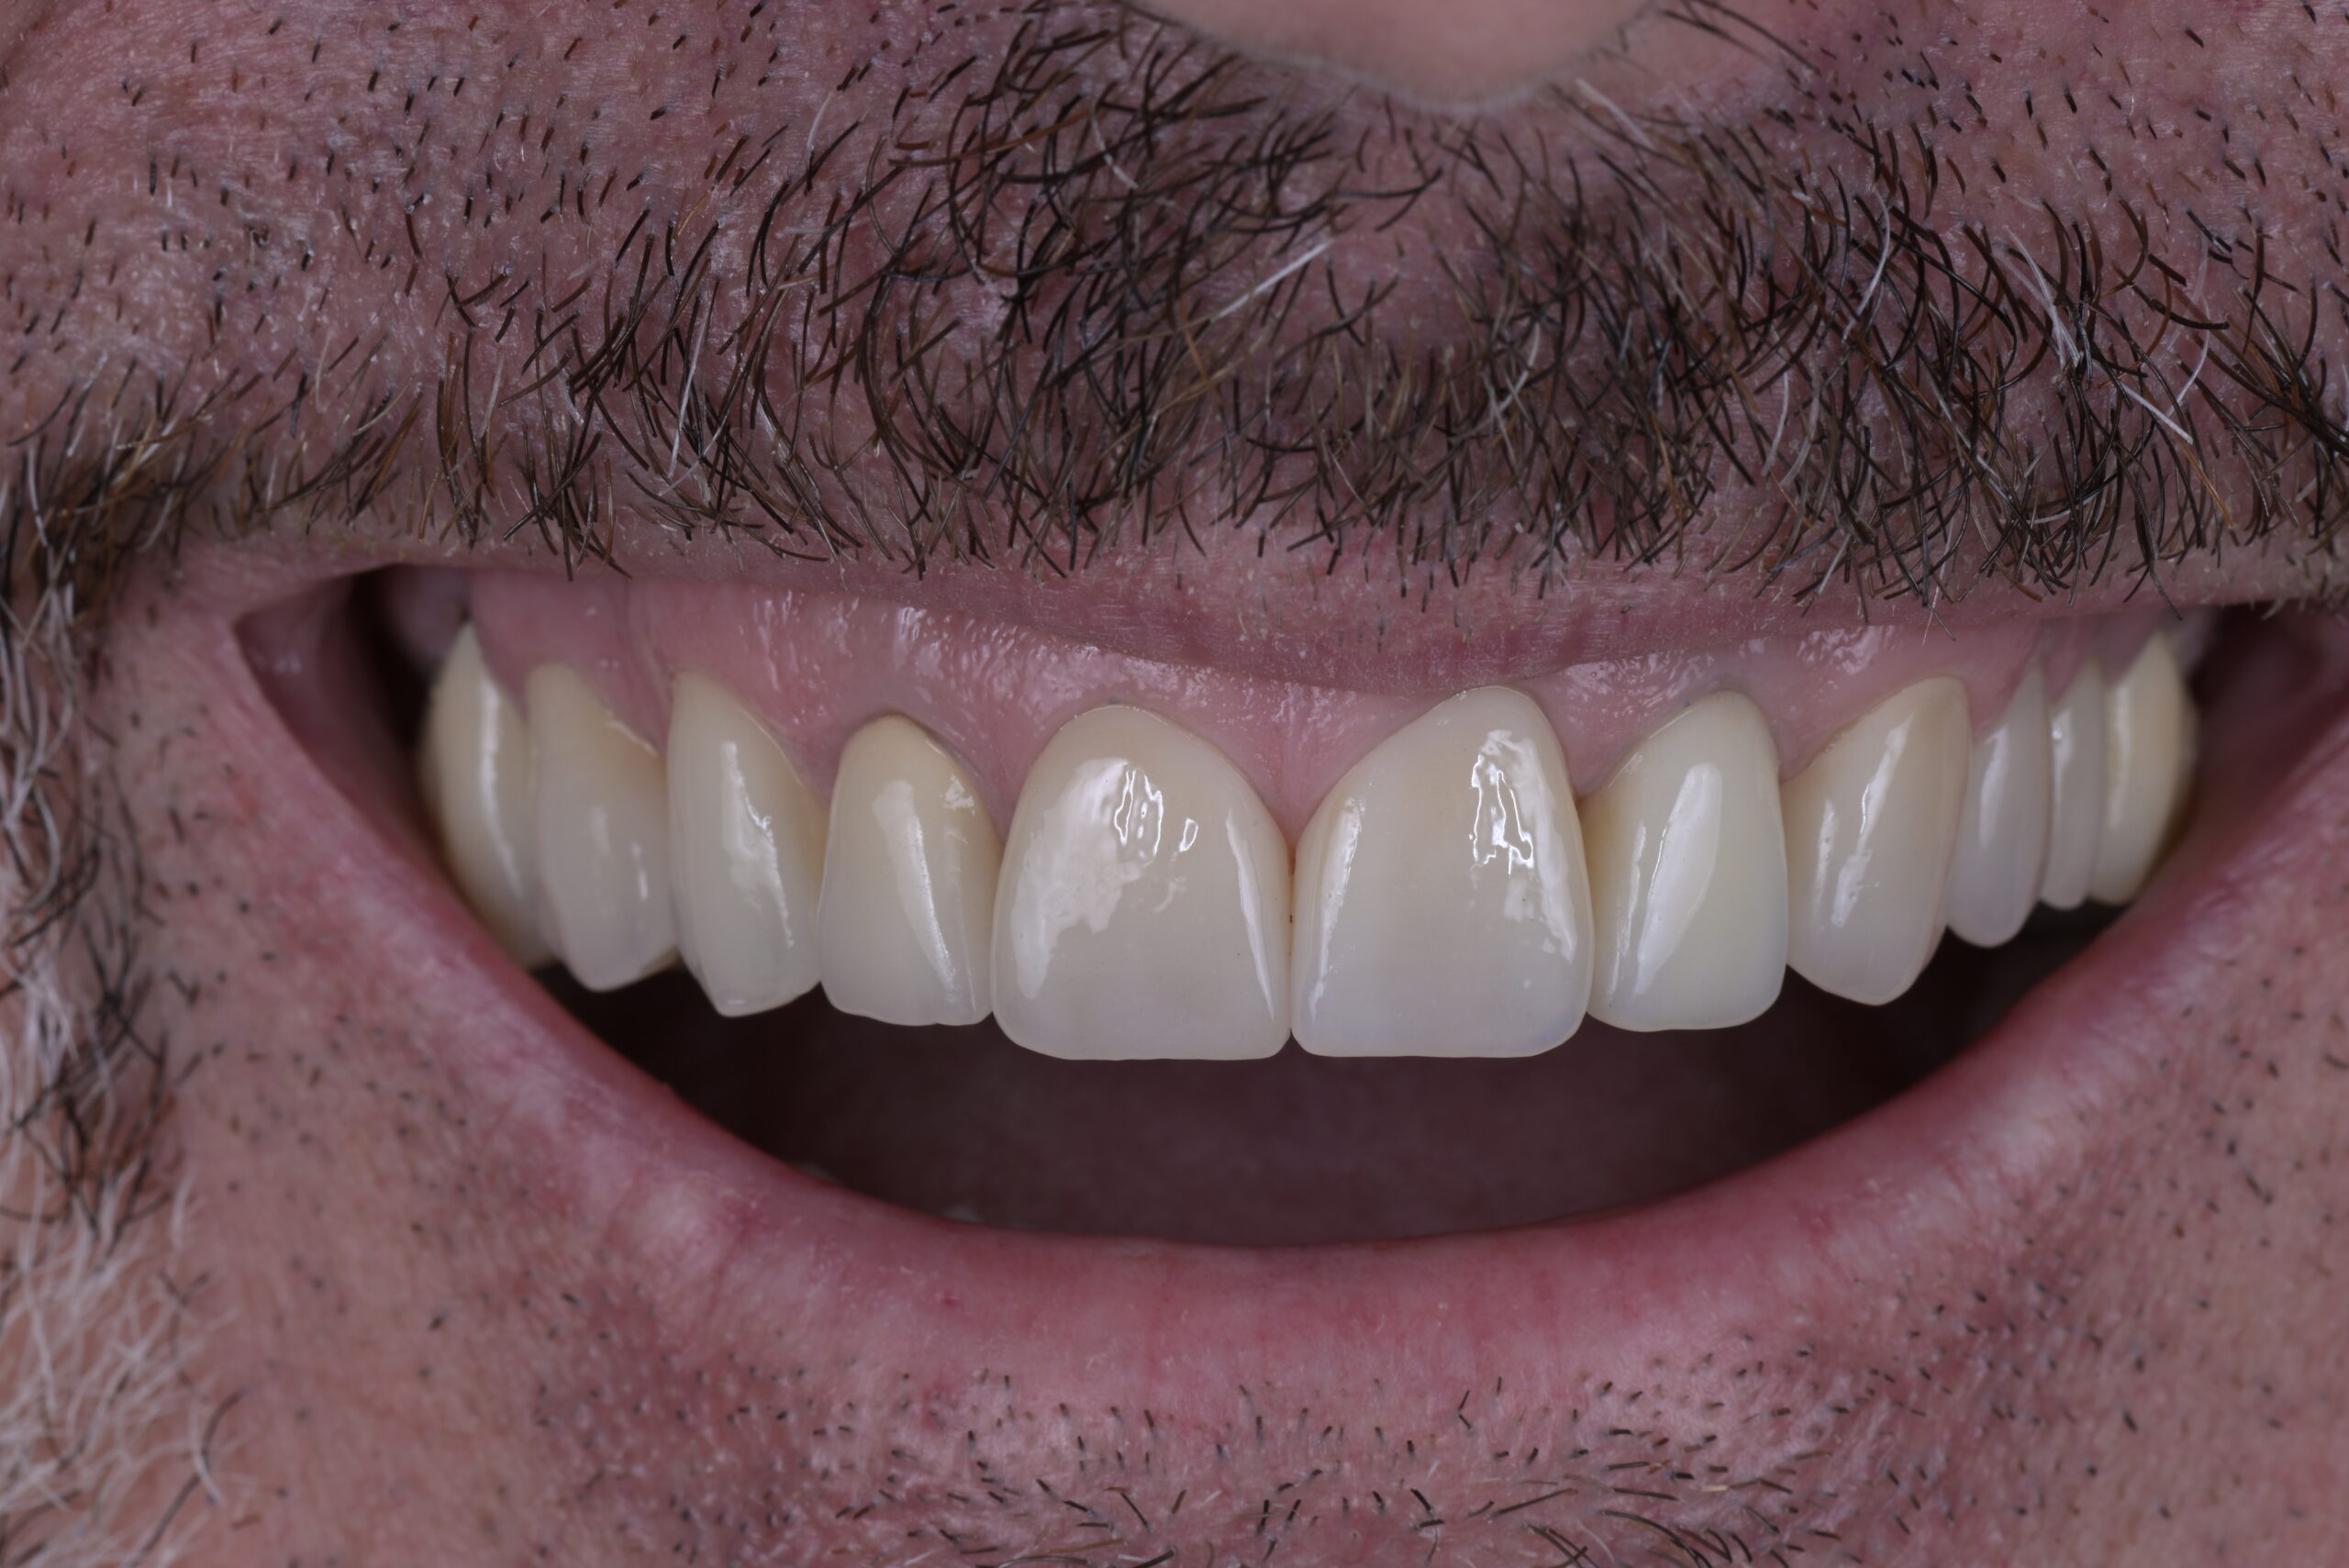
Step 1 — Initial records and motivation
- Full-face calibrated smile photo (used later for 3DNA alignment)
- Smile reference photos for communication and baseline.
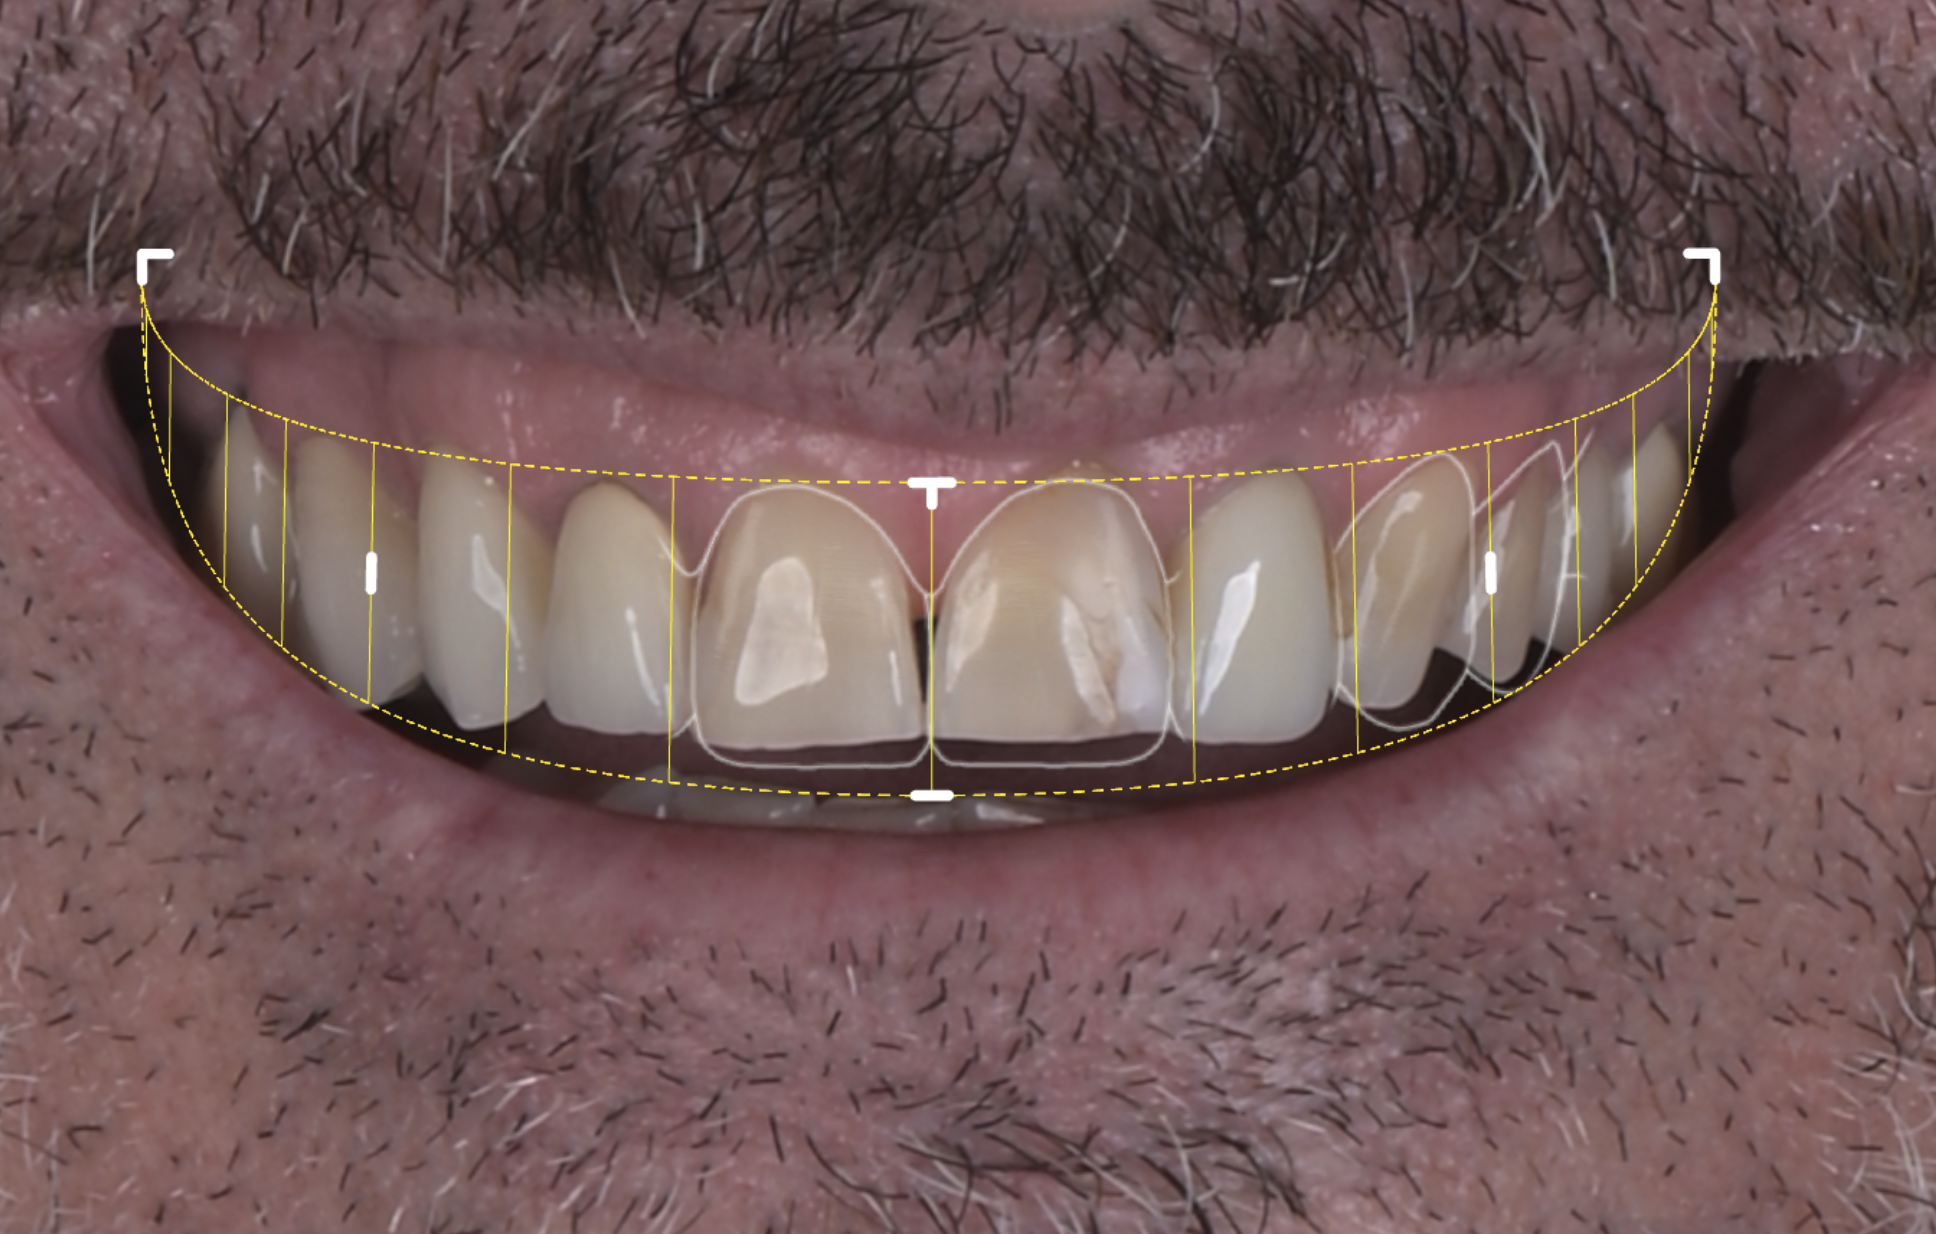
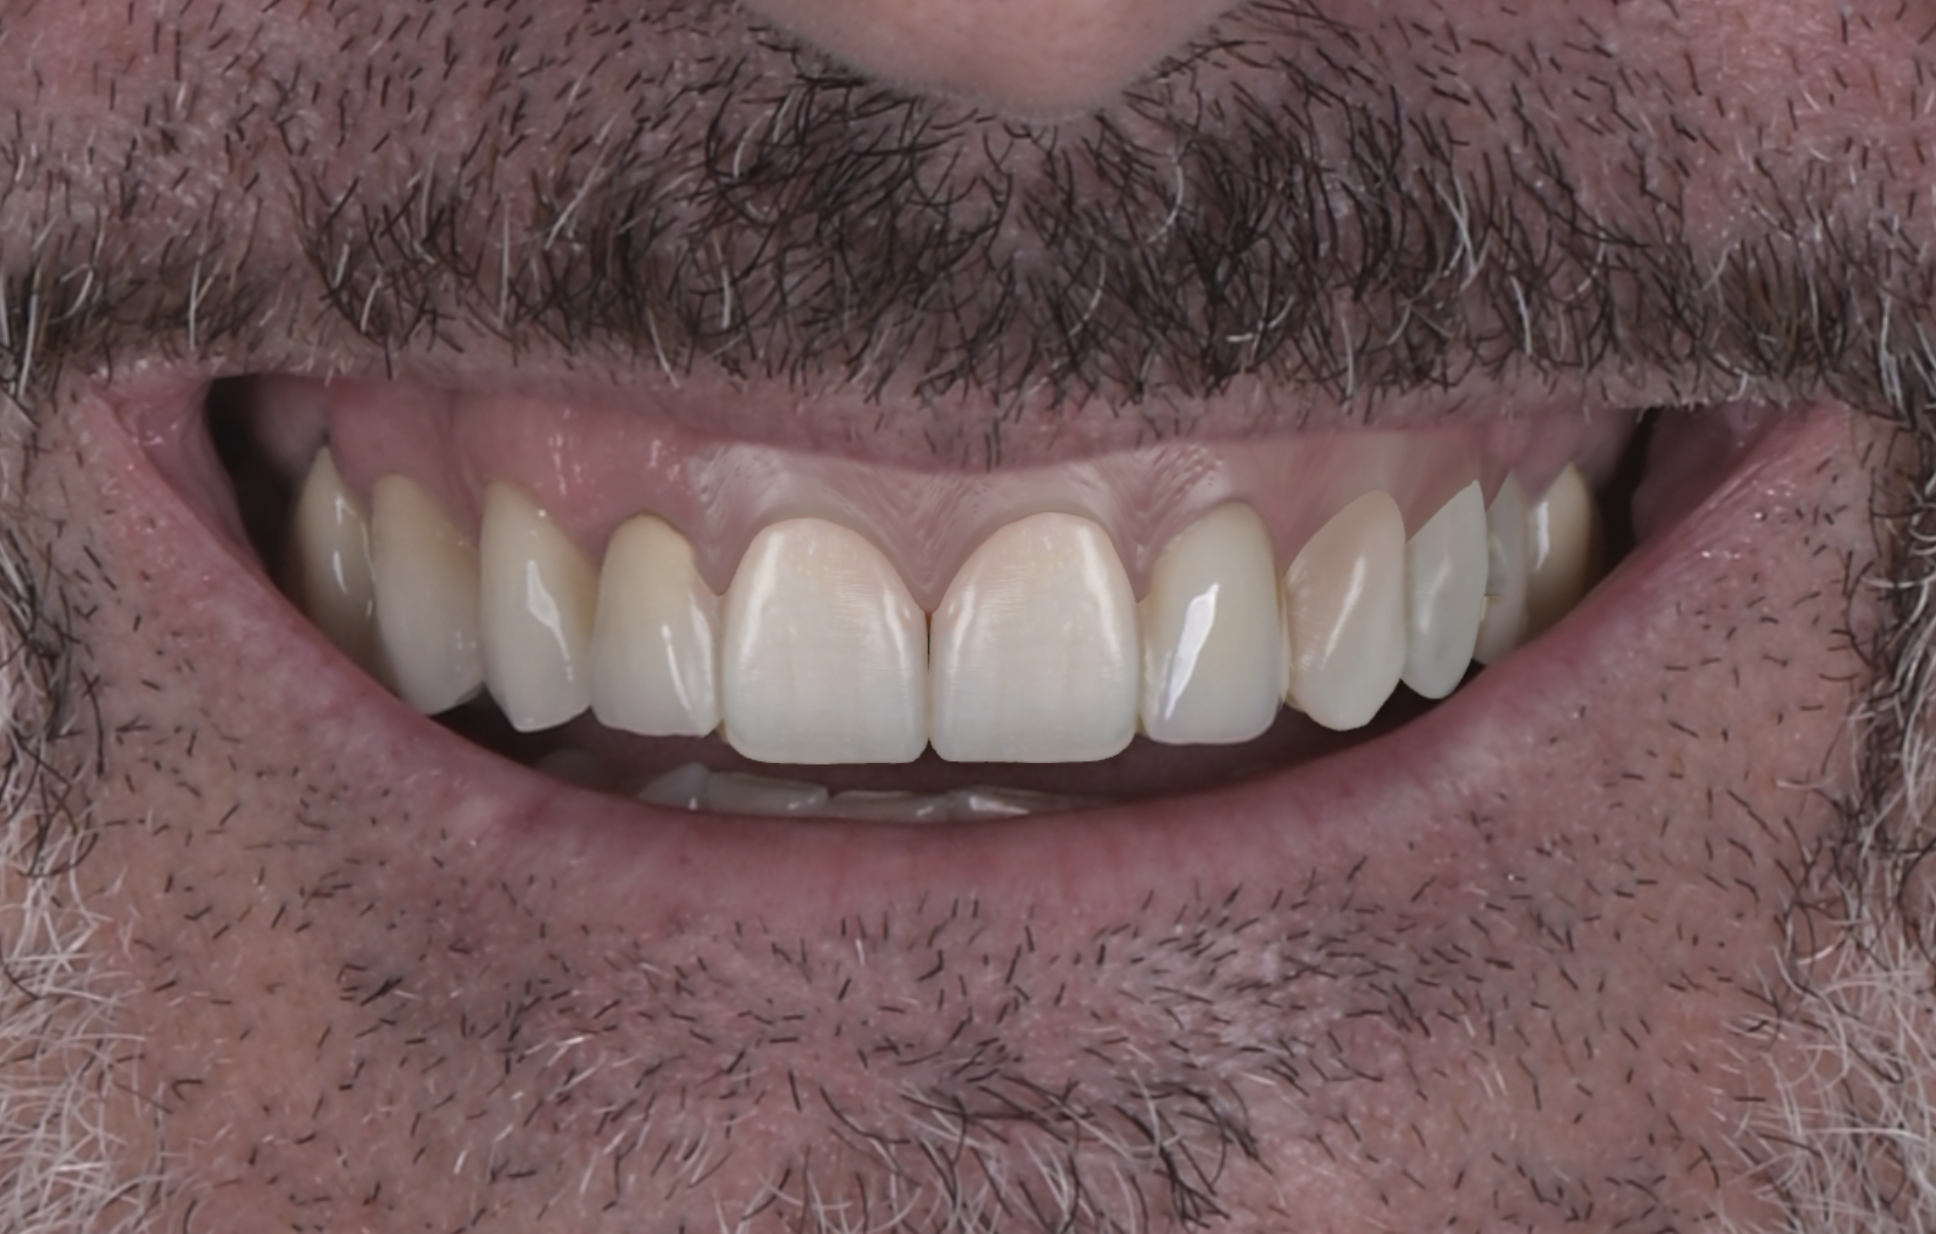
Step 2 — 2D Smile Design (Smilecloud)
- A quick 2D design was created to preview the aesthetic impact limited to 11–21–23–24
- The aim was to establish tooth proportions, incisal edge position, and smile harmony without changing the entire arch.
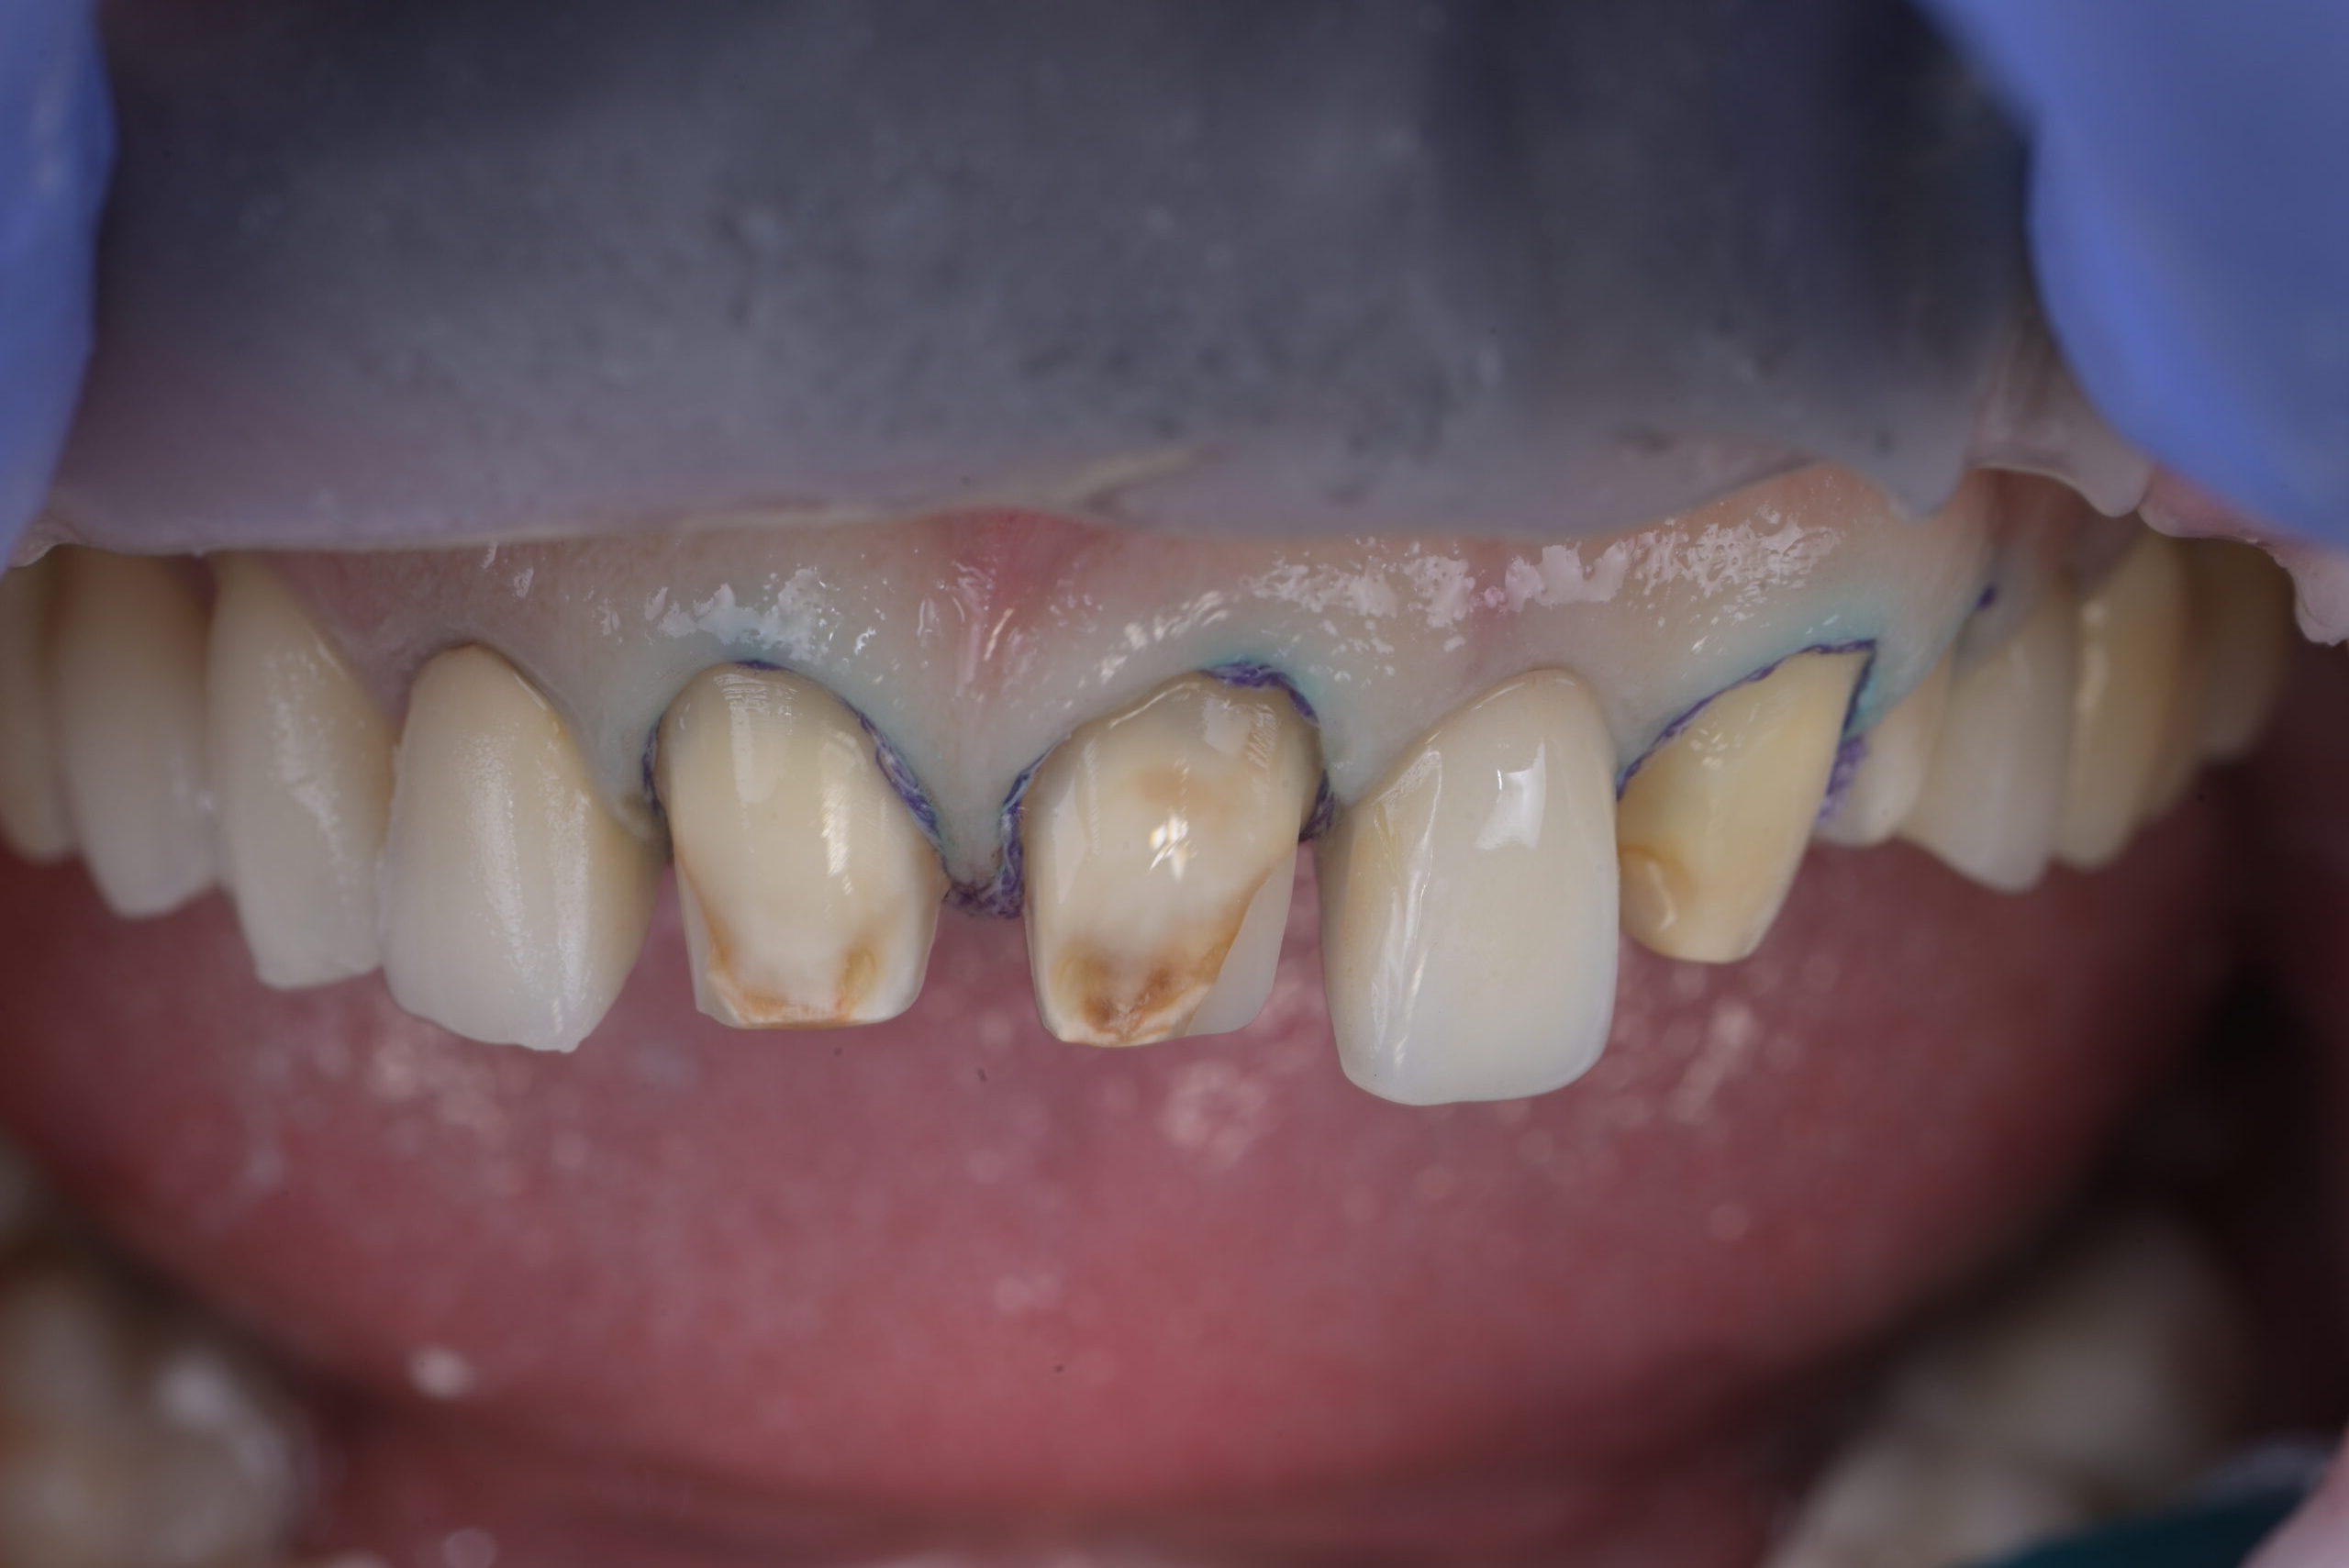
Step 3 — Clinical preparation (generic preps)
- Four crowns were prepared using a practical “everyday” approach — generic but controlled, designed to allow an efficient transition into a definitive prosthetic outcome.
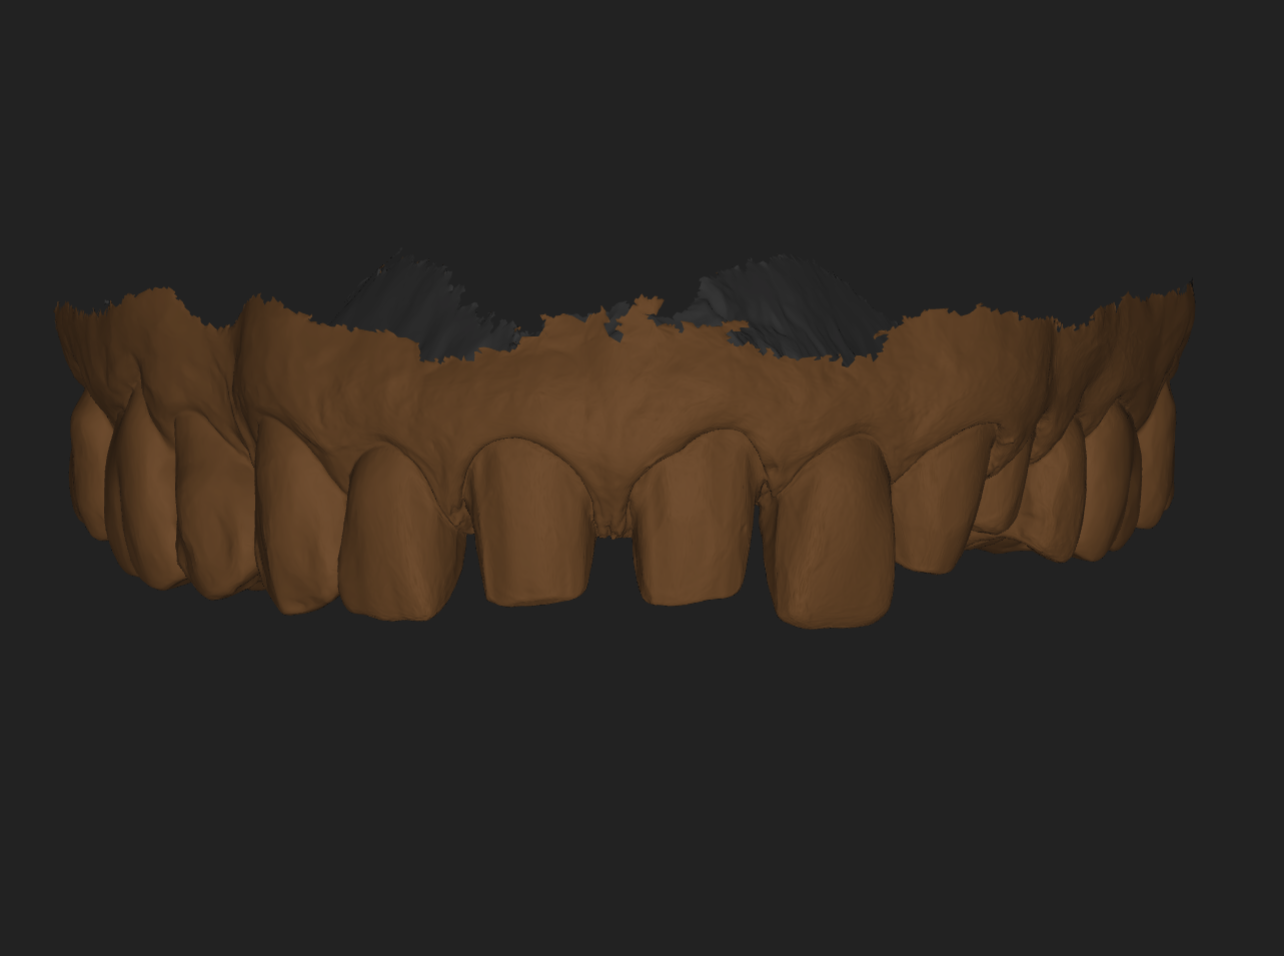
Step 4 — Intraoral scanning (TRIOS)
Two key datasets were captured:
- Pre-prep scan (baseline morphology and occlusal relationship - for PHOTO ALIGMENT)
- Post-prep scan (real preparation geometry for blueprint design).
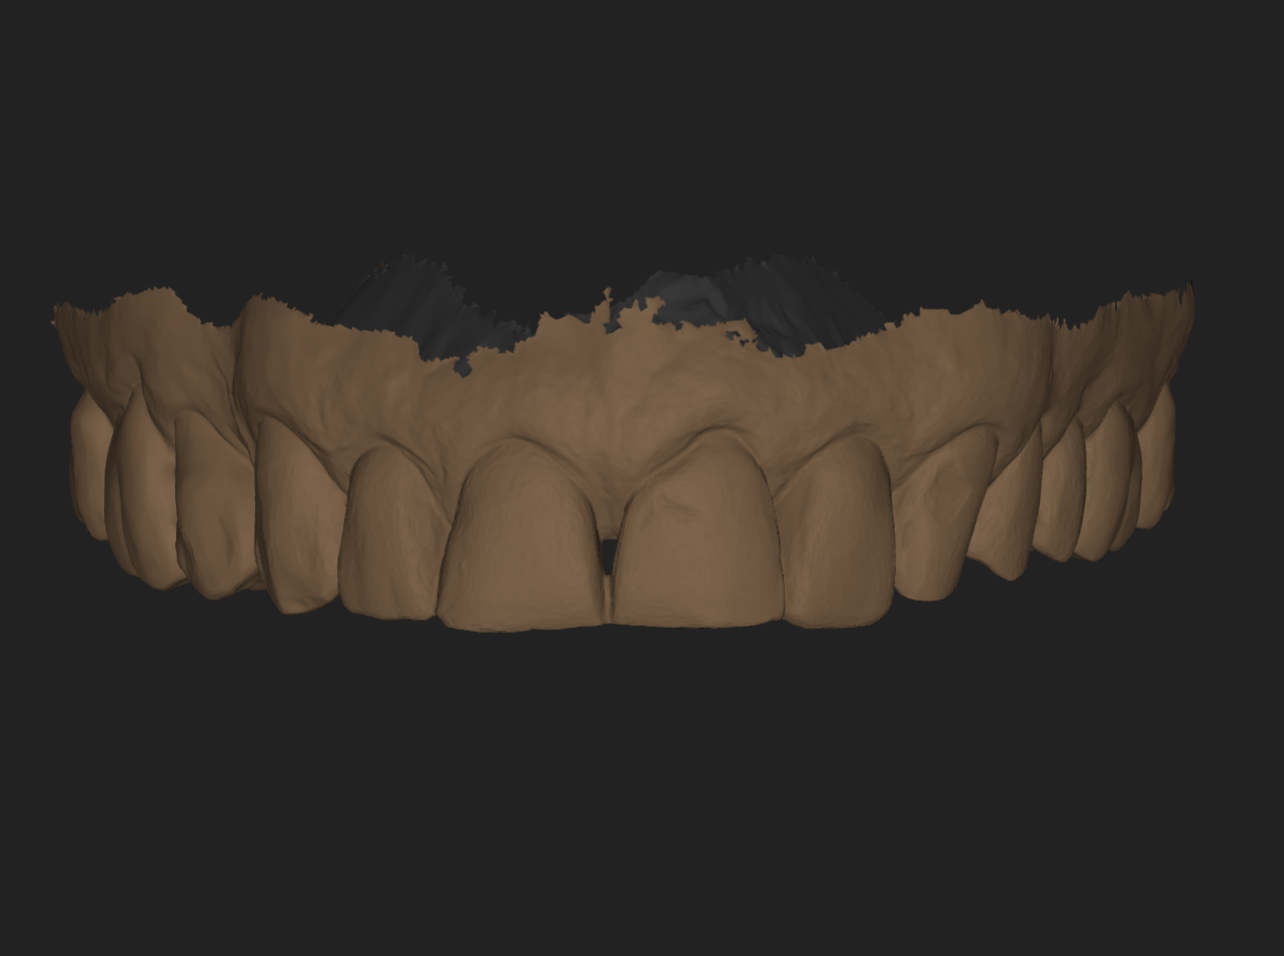
Step 5 — 3DNA Blueprint creation (Smilecloud)
- Scans were uploaded to Smilecloud and a 3DNA blueprint was created.
- The 3D models were aligned to the patient’s face using one calibrated face photo (no facebow) and the pre-prep scan.
- The earlier 2D design was applied and refined in 3D on the selected teeth only.
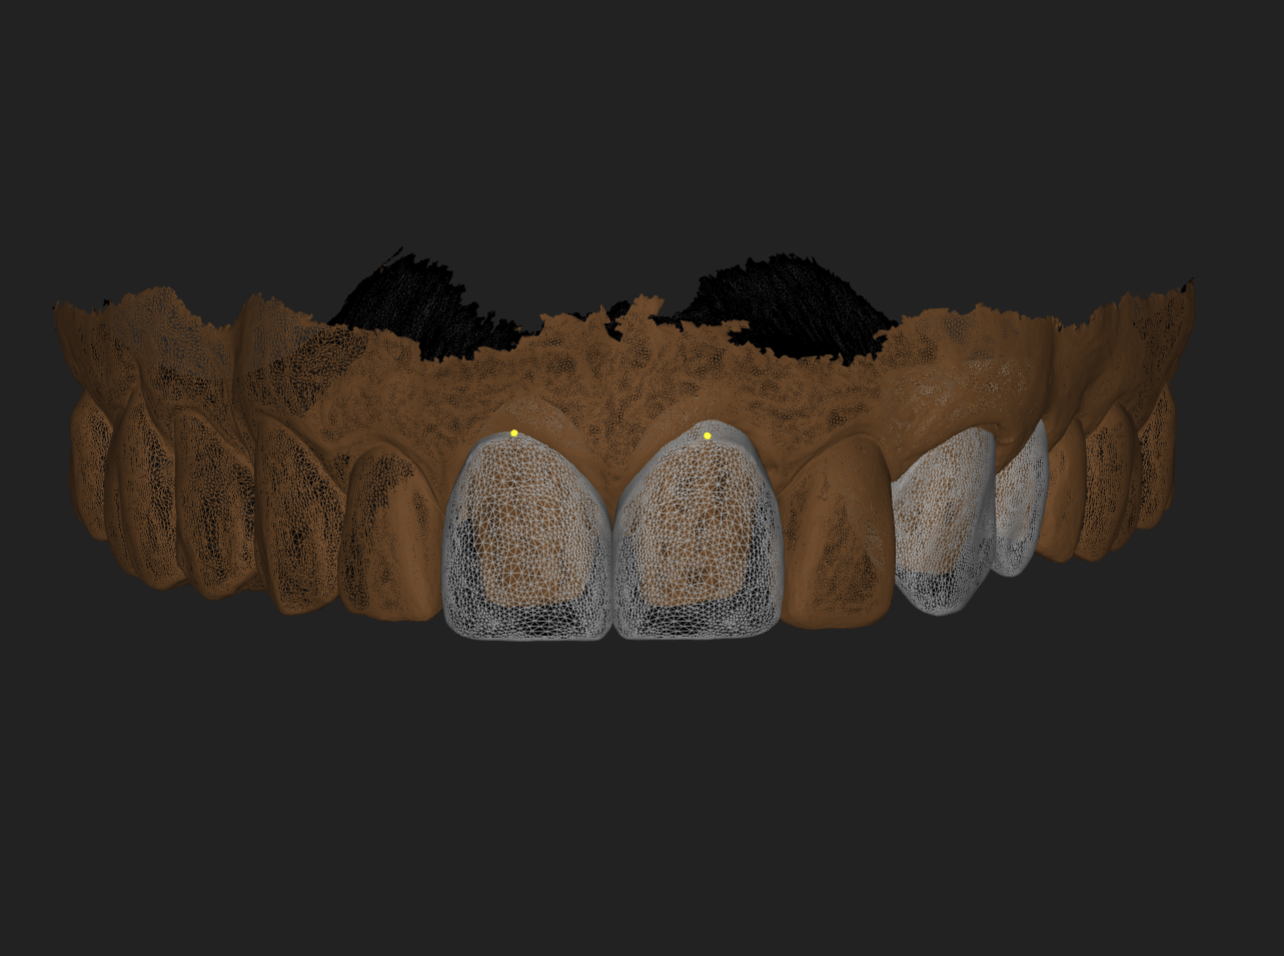
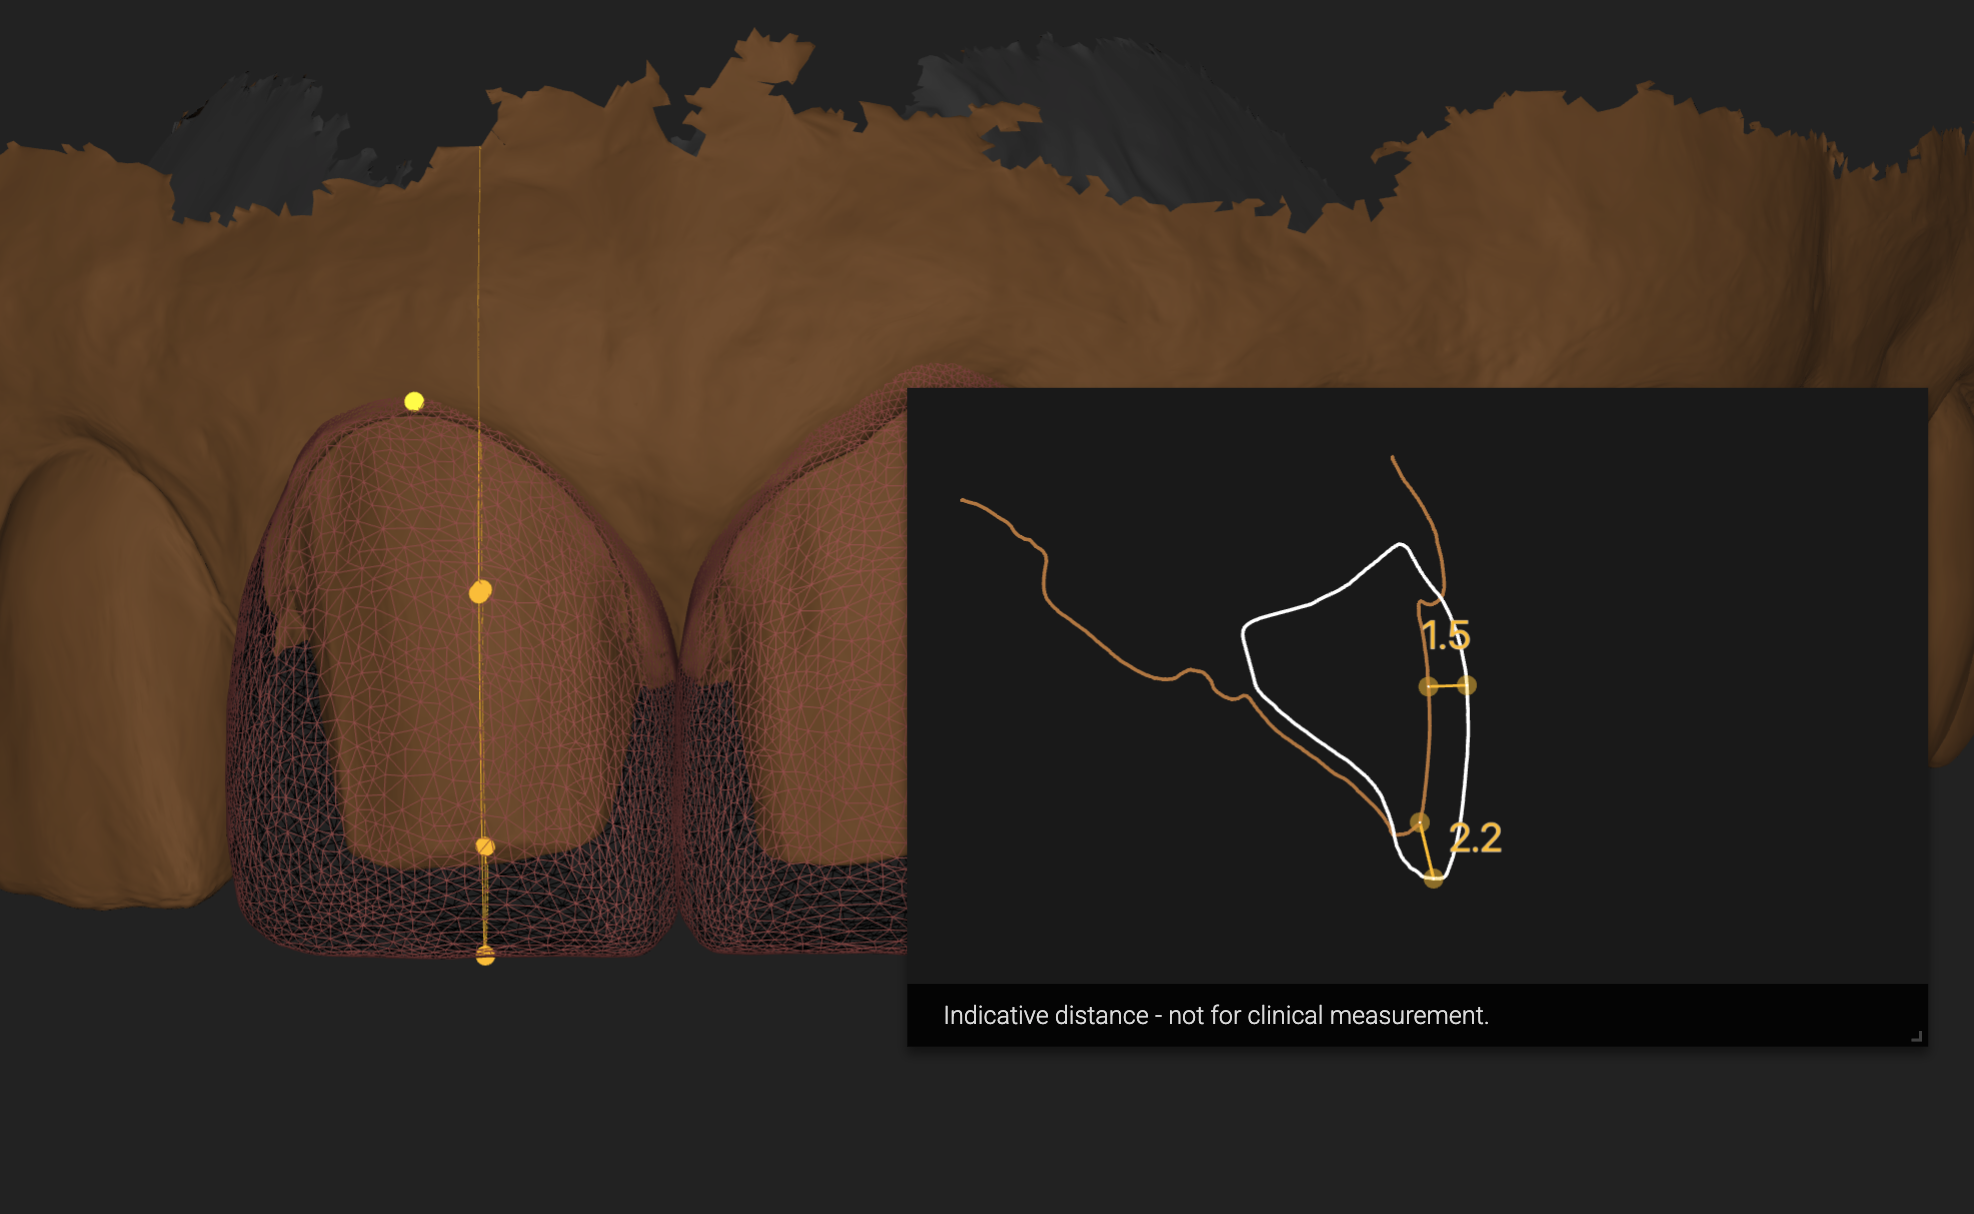
Step 6 — “Design-over-prep” validation
A critical feature of this workflow is the overlap of the planned restoration design with the actual preparations, ensuring:
- correct spatial orientation
- predictable incisal edge/length changes
- controlled material thickness and emergence direction
- reduced back-and-forth with the technician.
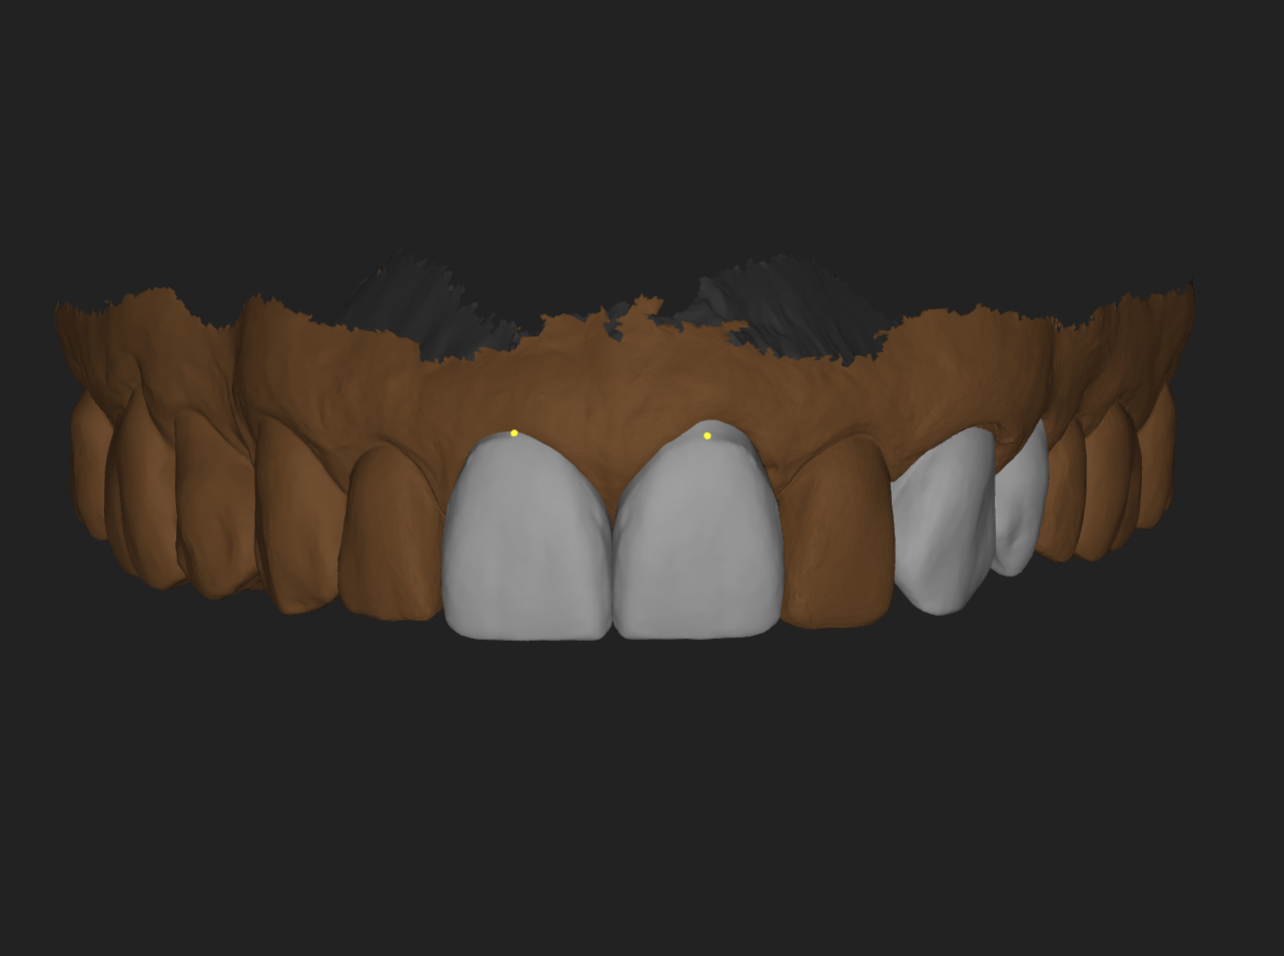
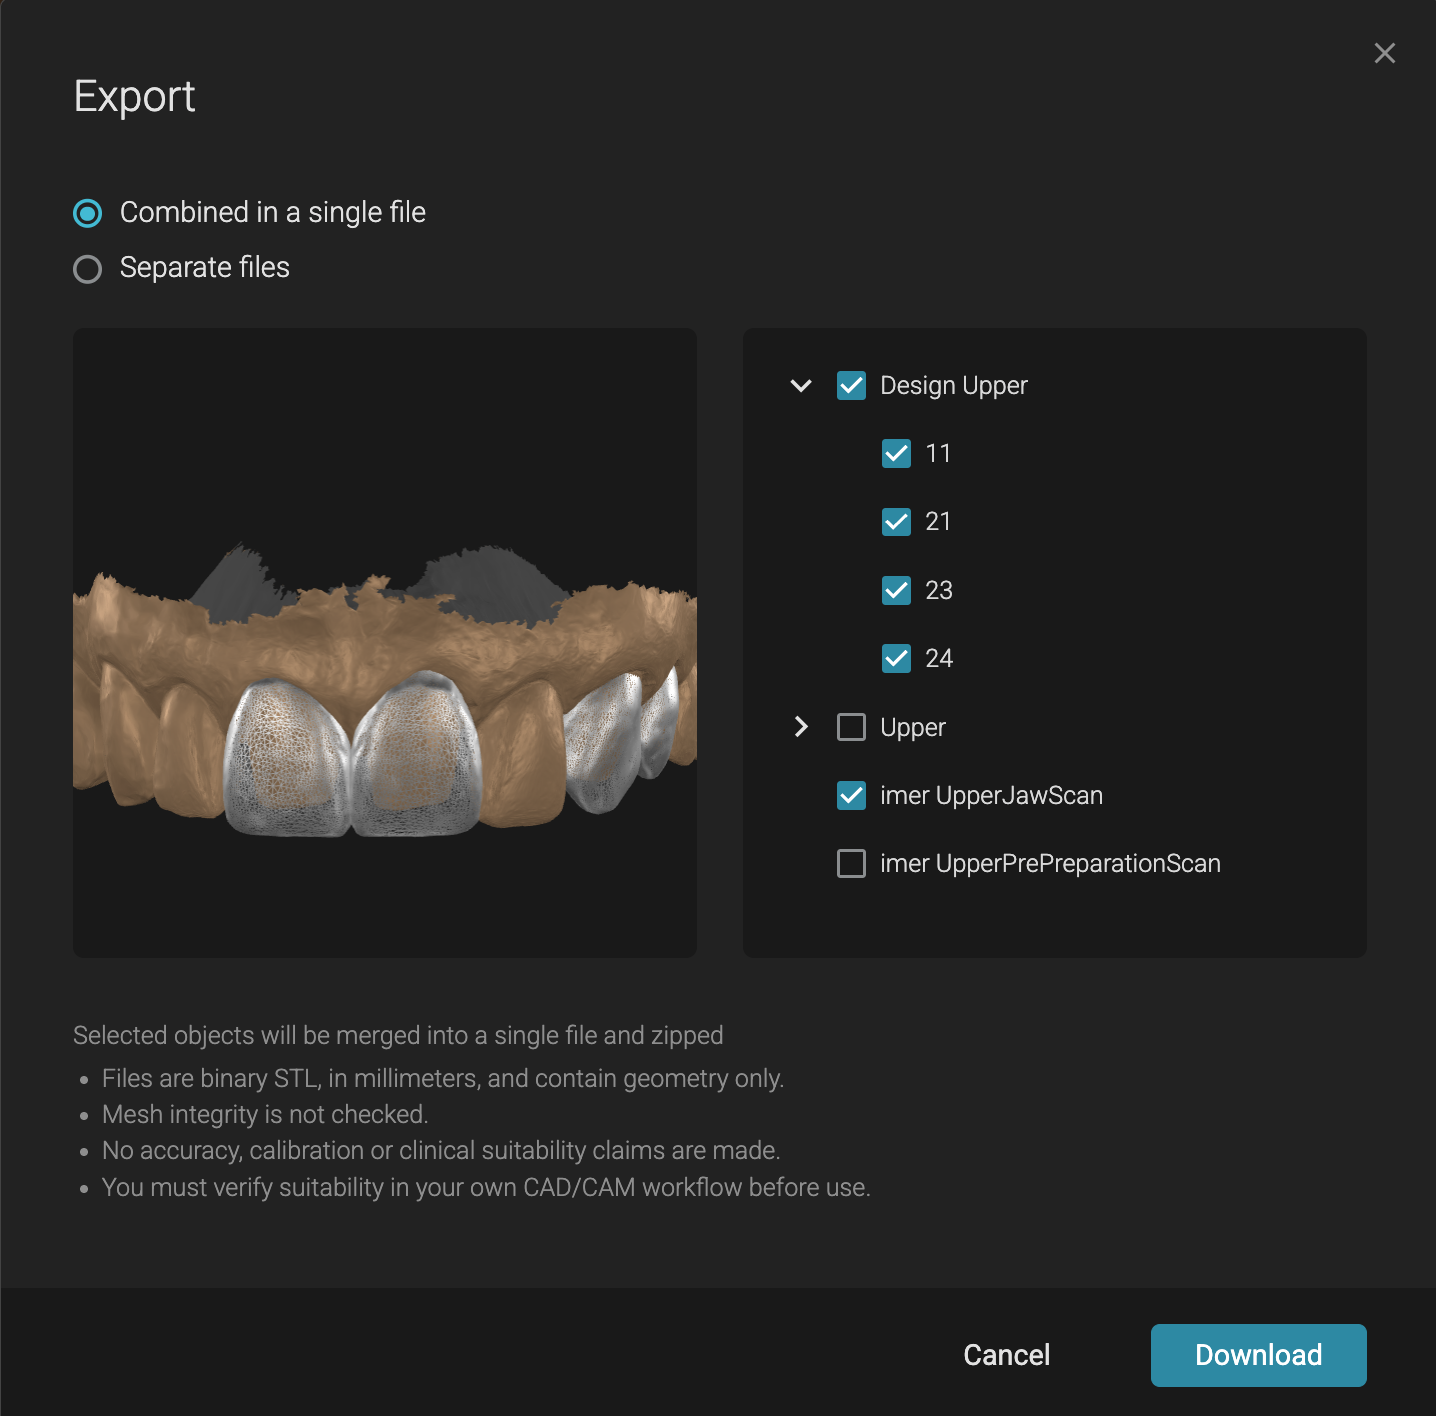
Step 7 — Export + lab communication
The technician received a final blueprint that included:
- Correct maxillary orientation derived from the face photo
- Exact planned tooth shapes and lengths (based on 2D-to-3D transfer)
- Real prep geometry and occlusal relationships (from TRIOS scans)
- This becomes a “single source of truth” for definitive restorations.
Ready to take your planning to the next level?
Learn more about The Smile Protocol
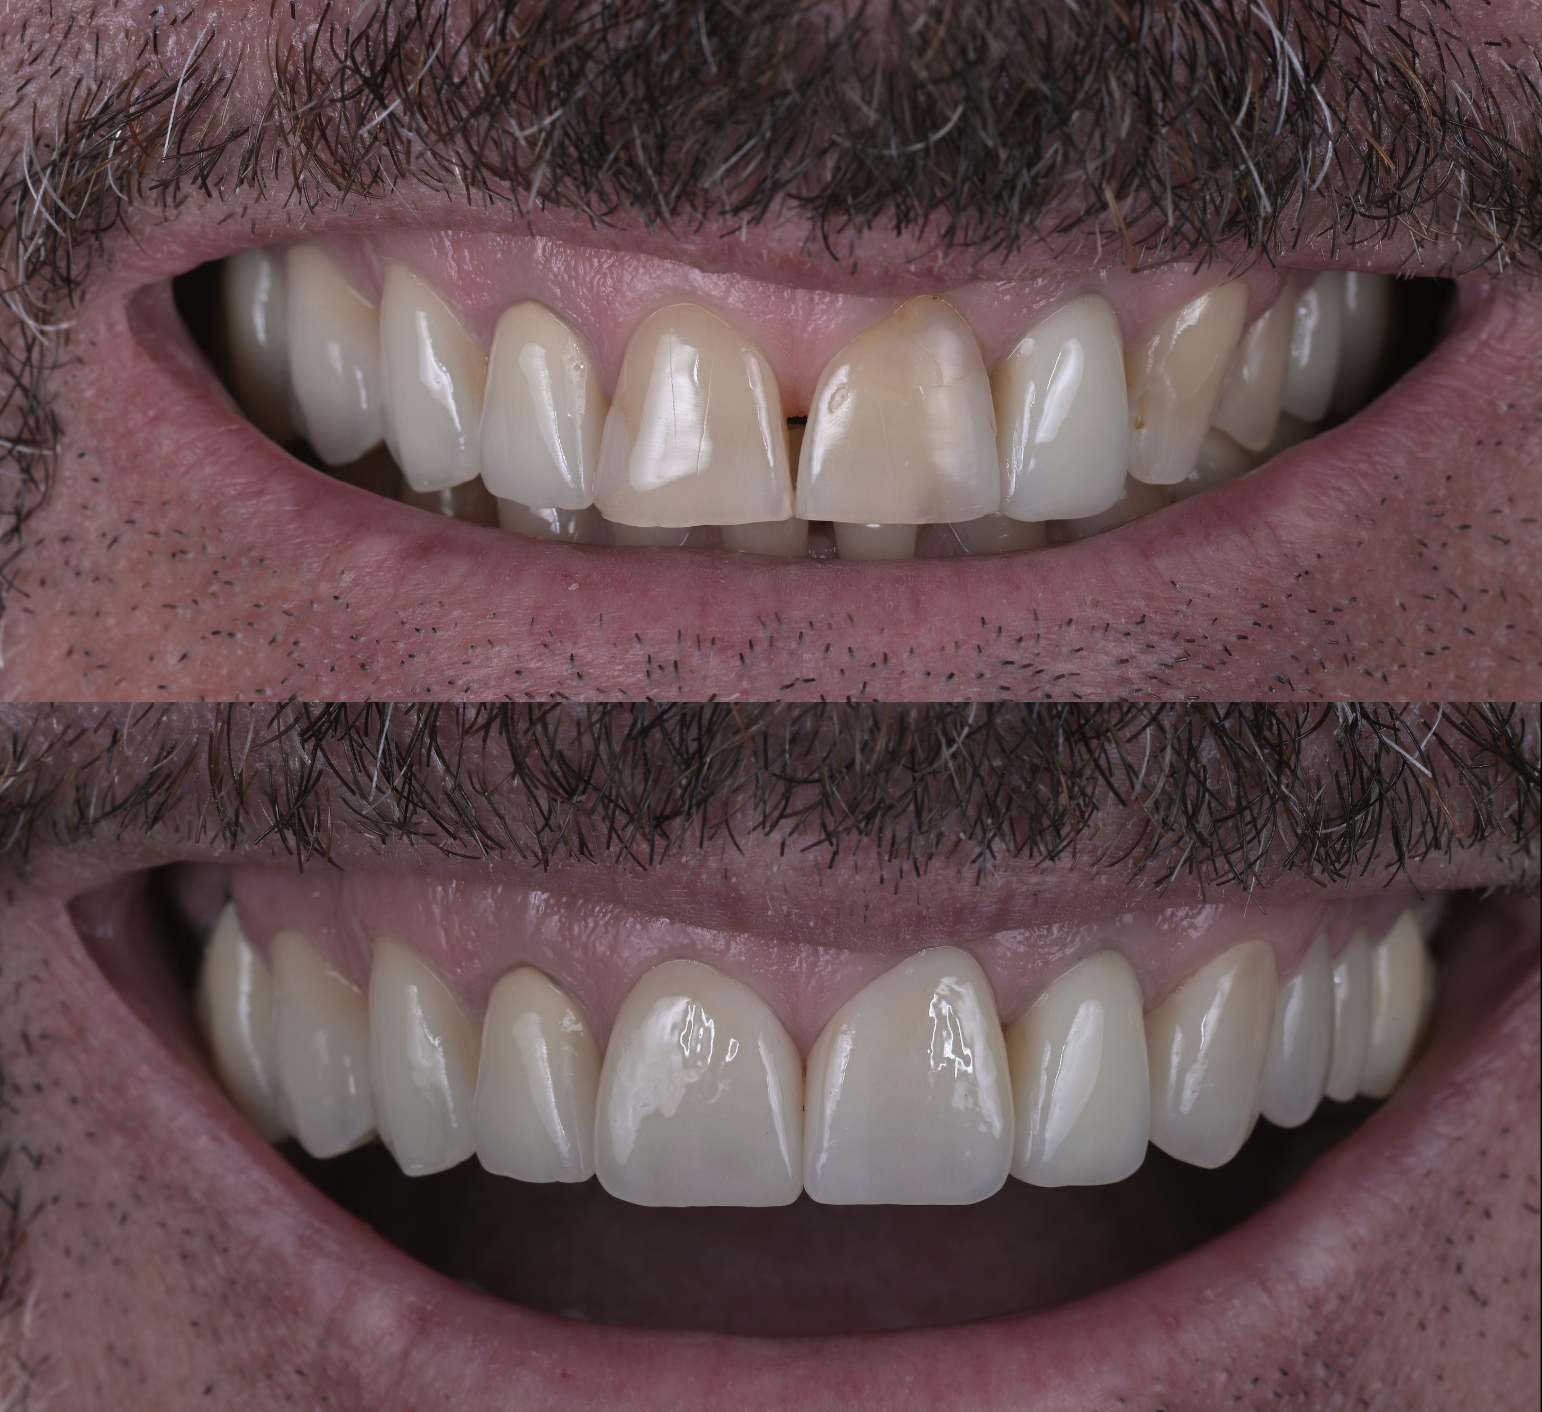
Outcome and key deliverables
Primary outcome: A fast, clinically realistic workflow that produces a precise, facially oriented 3D blueprint without requiring a full wax-up/mock-up protocol.
Deliverable to the lab: A 3D plan that combines facial orientation + restorative target shapes + real prep geometry in one package.
Discussion (why this matters)
Many clinicians avoid advanced 3D planning in daily practice because traditional workflows require extra steps (wax-up, mock-up, facebow, multiple appointments). This case demonstrates a practical alternative: use 2D for fast communication, then transfer into 3D directly over the preparations to achieve predictability and reduce interpretation errors. The result is a technician-friendly blueprint that supports consistent execution — especially in partial-arch “esthetic upgrade” cases.
Clinical takeaway
This is the “busy schedule” way to implement 3DNA:
- treat only what the patient wants to change
- prep efficiently
- scan accurately
- align to a single calibrated photo
- design in 3D over the real preps
- export a blueprint that the lab can’t misread.